
Face-to-Face Management
Setting Up Events
Learn how to create events and schedule sessions for face-to-face training in ClearXP.
Setting Up Events
Section titled “Setting Up Events”ClearXP provides a hierarchical structure to managing face-to-face training that is composed of Programs, Events and Sessions.
The following is a description of these three key concepts:
- Program - A Program is a collection of events required to meet an overarching learning goal.
- Events - An Event represents an assembly of people for a particular purpose at a certain point in time. Events can be one-off such as a conference, or have multiple occurrences such as a workshop.
- Sessions - A Session represents a single occurrence of an event - typically sessions will be equivalent, but scheduled with a different date, location or facilitator. To capture workshops that consist of multiple parts or days, these should be created as separate Events within a single Program.
Creating a Program
Section titled “Creating a Program”Creating an Event
Section titled “Creating an Event”Events can be used to capture a baseline unit of training in the physical world. Follow the below steps to create an Event:
1. In the ClearXP admin interface, navigate to Activities
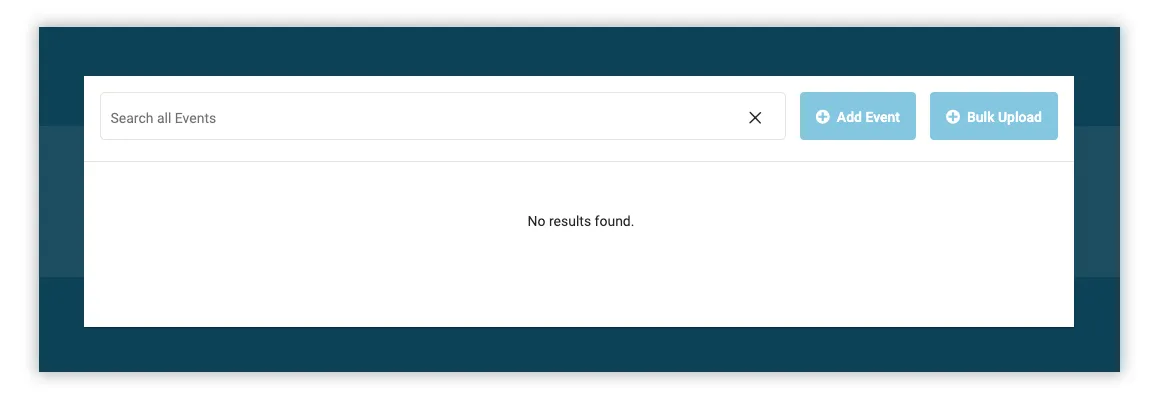
2. Click Add Event to create a new event
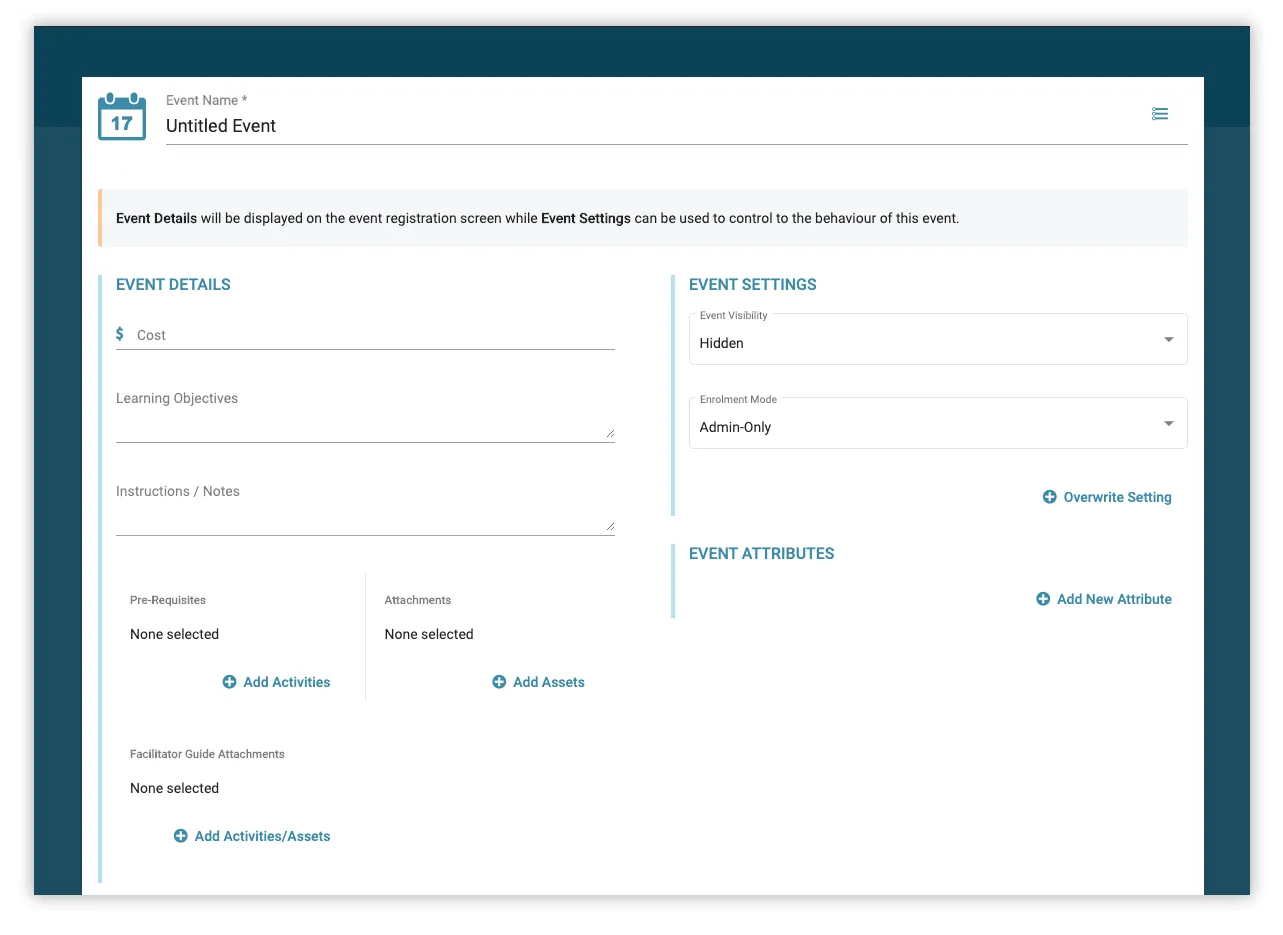
3. Fill in any Event Details – details here will be displayed in the Learning Hub when viewing the event.
| Field | Description | Required |
|---|---|---|
| Event Name | Will be displayed in reports and the Learning Hub when the user is searching for an event. | Yes |
| Cost | The cost of attendance - this is purely informative to indicate that the learner or their manager may be billed externally. | |
| Learning Objectives | A description of the learning objectives that will be achieved by attending this event. | |
| Instructions/Notes | Additional instructions that will be displayed to the learner that’s left up to the discretion of the admin creating the event. | |
| Prerequisites | A list of learning activities that will be displayed to the learner and should be completed prior to attending the event. | |
| Attachments | A list of files that will be supplied to the learner and can be downloaded prior to attending the event. This may include documents to be printed and brought on the day | |
| Facilitator Guide Attachments | A list of files that will be supplied to the facilitator of the event. These files will be hidden from the learner when viewing the event. | |
| Event Visibility | Whether to hide the event – it will not appear in search results. Instead, the event can be opened manually via a distributed link. | Yes |
| Enrolment Mode | Control how learners are enrolled into sessions within this event. | Yes |
| Event Attributes | Any other arbitrary attributes can be added that will be used when searching or generating reports on events. |
4. Click Save Event to finalise the creation of the event. Sessions cannot be added until the event has first been saved.
Adding Sessions
Section titled “Adding Sessions”An event only becomes useful once sessions have been scheduled to take place. Users can be enrolled into the session and their attendance marked at the conclusion of the session.
1. Within the event you want to add sessions to, click Add Session to create a new, unsaved session.
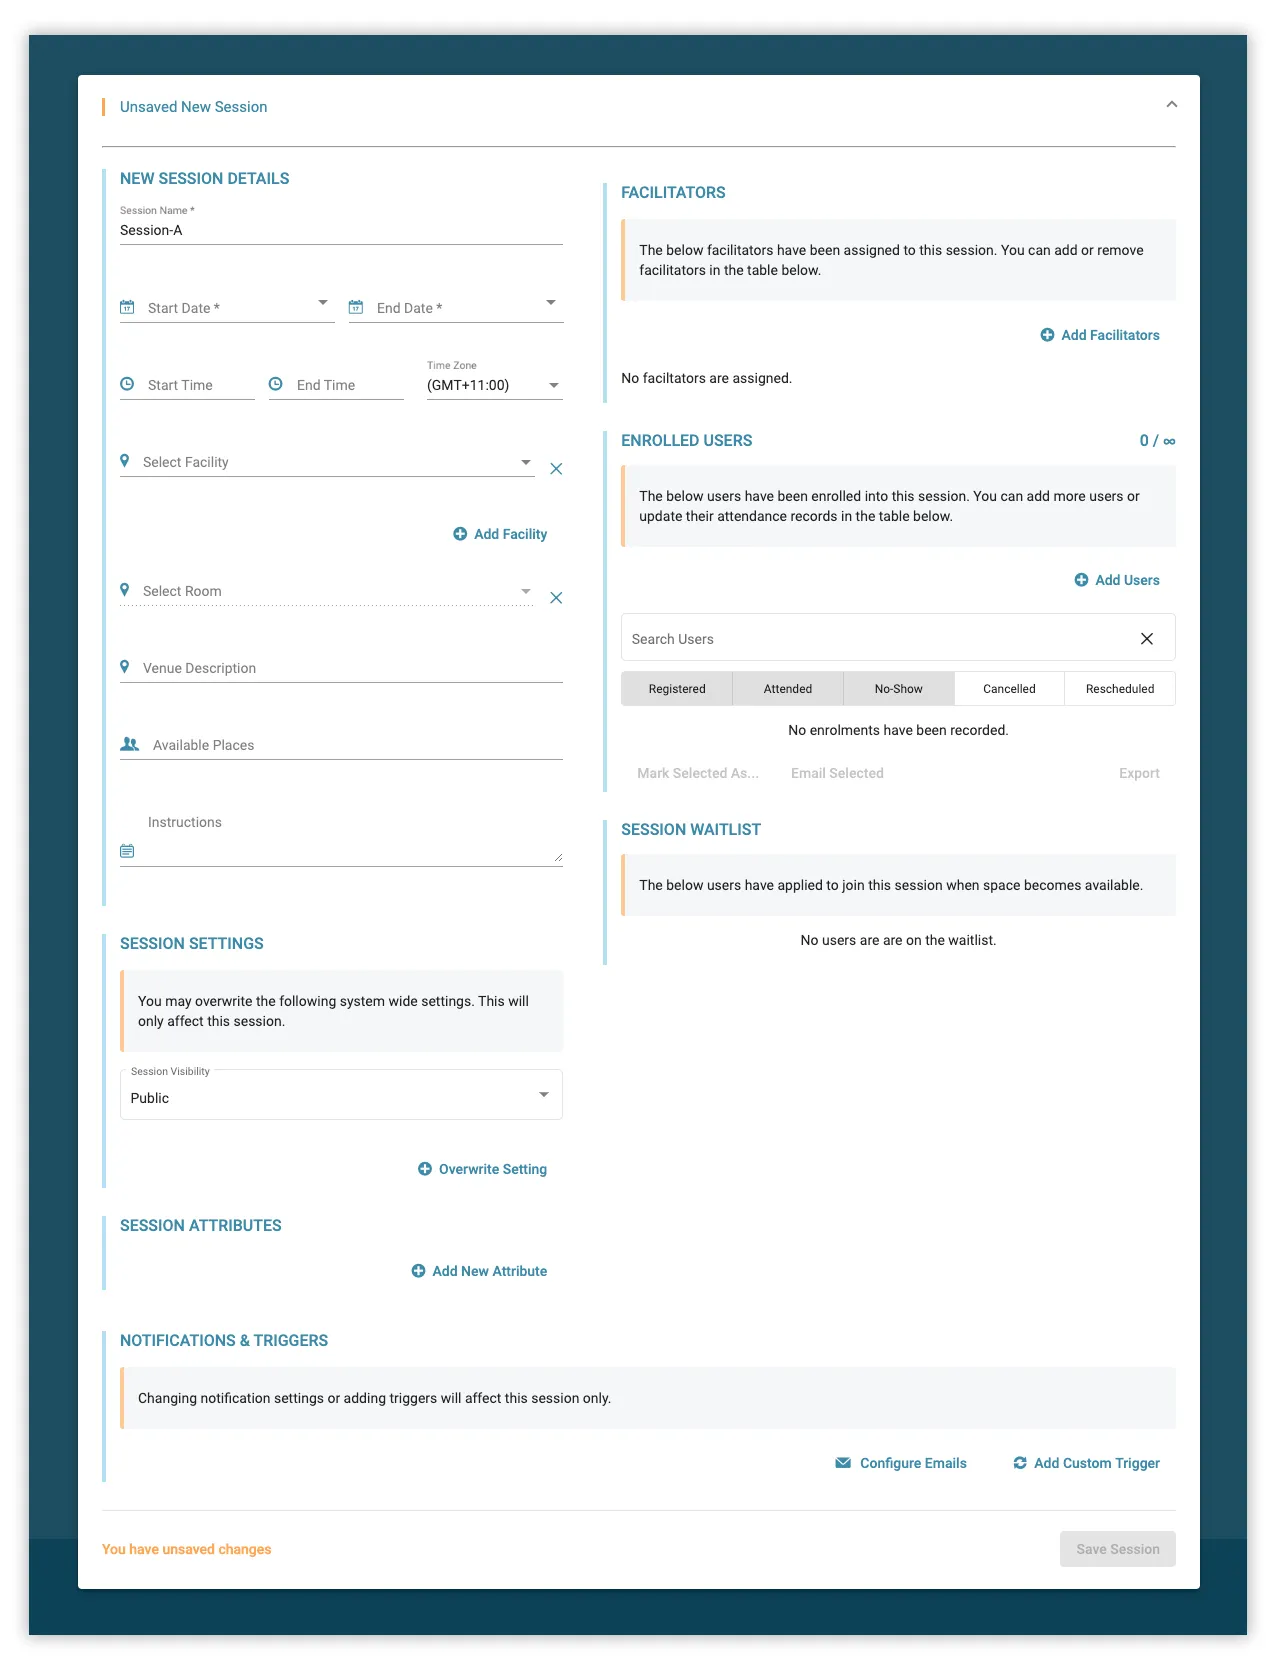
2. Populate any details as necessary
| Field | Description | Required |
|---|---|---|
| Session Name | Will be displayed in reports and the Learning Hub when the user is searching for an event. | Yes |
| Start Date | The date the session is scheduled to start on. | Yes |
| End Date | The date the session will end on - this may be the same as the Start Date or later if a multi-day event. | Yes |
| Start Time | The Start Time for the session. | Yes |
| End Time | The End Time for the session. | Yes |
| Time Zone | The Time Zone of the location the session will be held in. If the user’s time zone differs from this, the session will display the local time conversion alongside the scheduled time. | Yes |
| Facility | The location of the facility for where the session will take place. | |
| Room | The room within the facility for the session. | |
| Venue Description | An optional description to be displayed to the learner along with the venue details. | |
| Available Places | The maximum number of users that are allowed to self-enrol into this session. Self-registration will be disabled once this limit is reached but admins will still be able to enrol additional users. | |
| Instructions | Additional instructions that will be displayed to the learner that’s left up to the discretion of the admin creating the event. | |
| Session Attributes | Any other arbitrary attributes can be added that will be used when searching or generating reports on sessions. |
3. Click Save Session to finalise the creation of the session. If Event Visibility is set to ‘Public’ then this session will now be listed when the event is viewed within the Learning Hub.
Uploading Sessions
Section titled “Uploading Sessions”If managing a large number of events and sessions, it may be more efficient to bulk upload a CSV file that consists of all session details instead of creating each session manually through the interface.
Read instructions on how to bulk upload activities.
Expressions of Interest
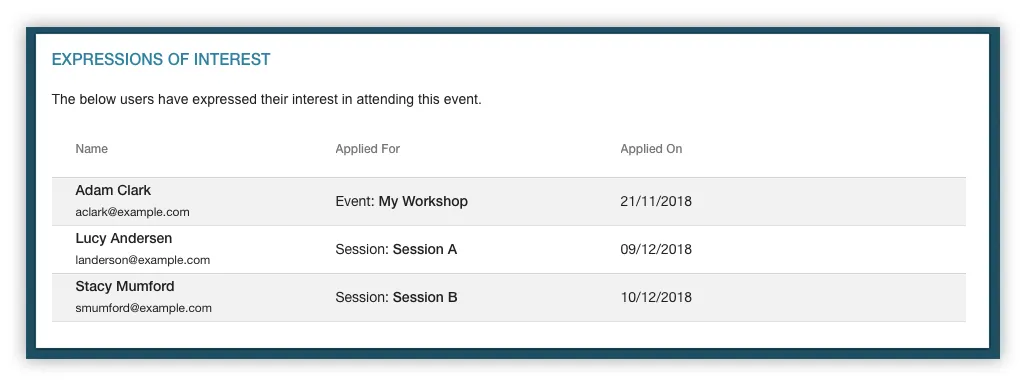
Section titled “Expressions of Interest”Every event contains an Expressions of Interest list that captures users who would like to attend the event but are unable to due to lack of available places. There are two distinct ways a user may be added to the Expressions of Interest table:
- If there are no scheduled sessions for an event, a Register Your Interest button will be shown on the Event Screen - clicking this button allows the user to express interest in the overall event.
- If a session is full and self-registration is allowed, a user will see a button to Join Waitlist - clicking this button will add the user to the waitlist for that specific session, as well as the overall Register Your Interest list.
Within the Register Your Interest table, these two actions are distinguished by the Applied For column which indicates if the user applied for the event or a specific session.
This table is useful for monitoring interest for an event that is full or not currently running. Once enough interest has been gathered, sessions can then be created and these users optionally enrolled into one of those sessions.