
Administration Guides
Bulk Uploading
Save time by bulk uploading users and activities from a CSV file.
Bulk Uploading
Section titled “Bulk Uploading”Uploading Users
Section titled “Uploading Users”It’s possible to import new users and update existing users at once by uploading a CSV file of changes that need to be made.
1. In the ClearXP admin interface, navigate to Users > Bulk Upload
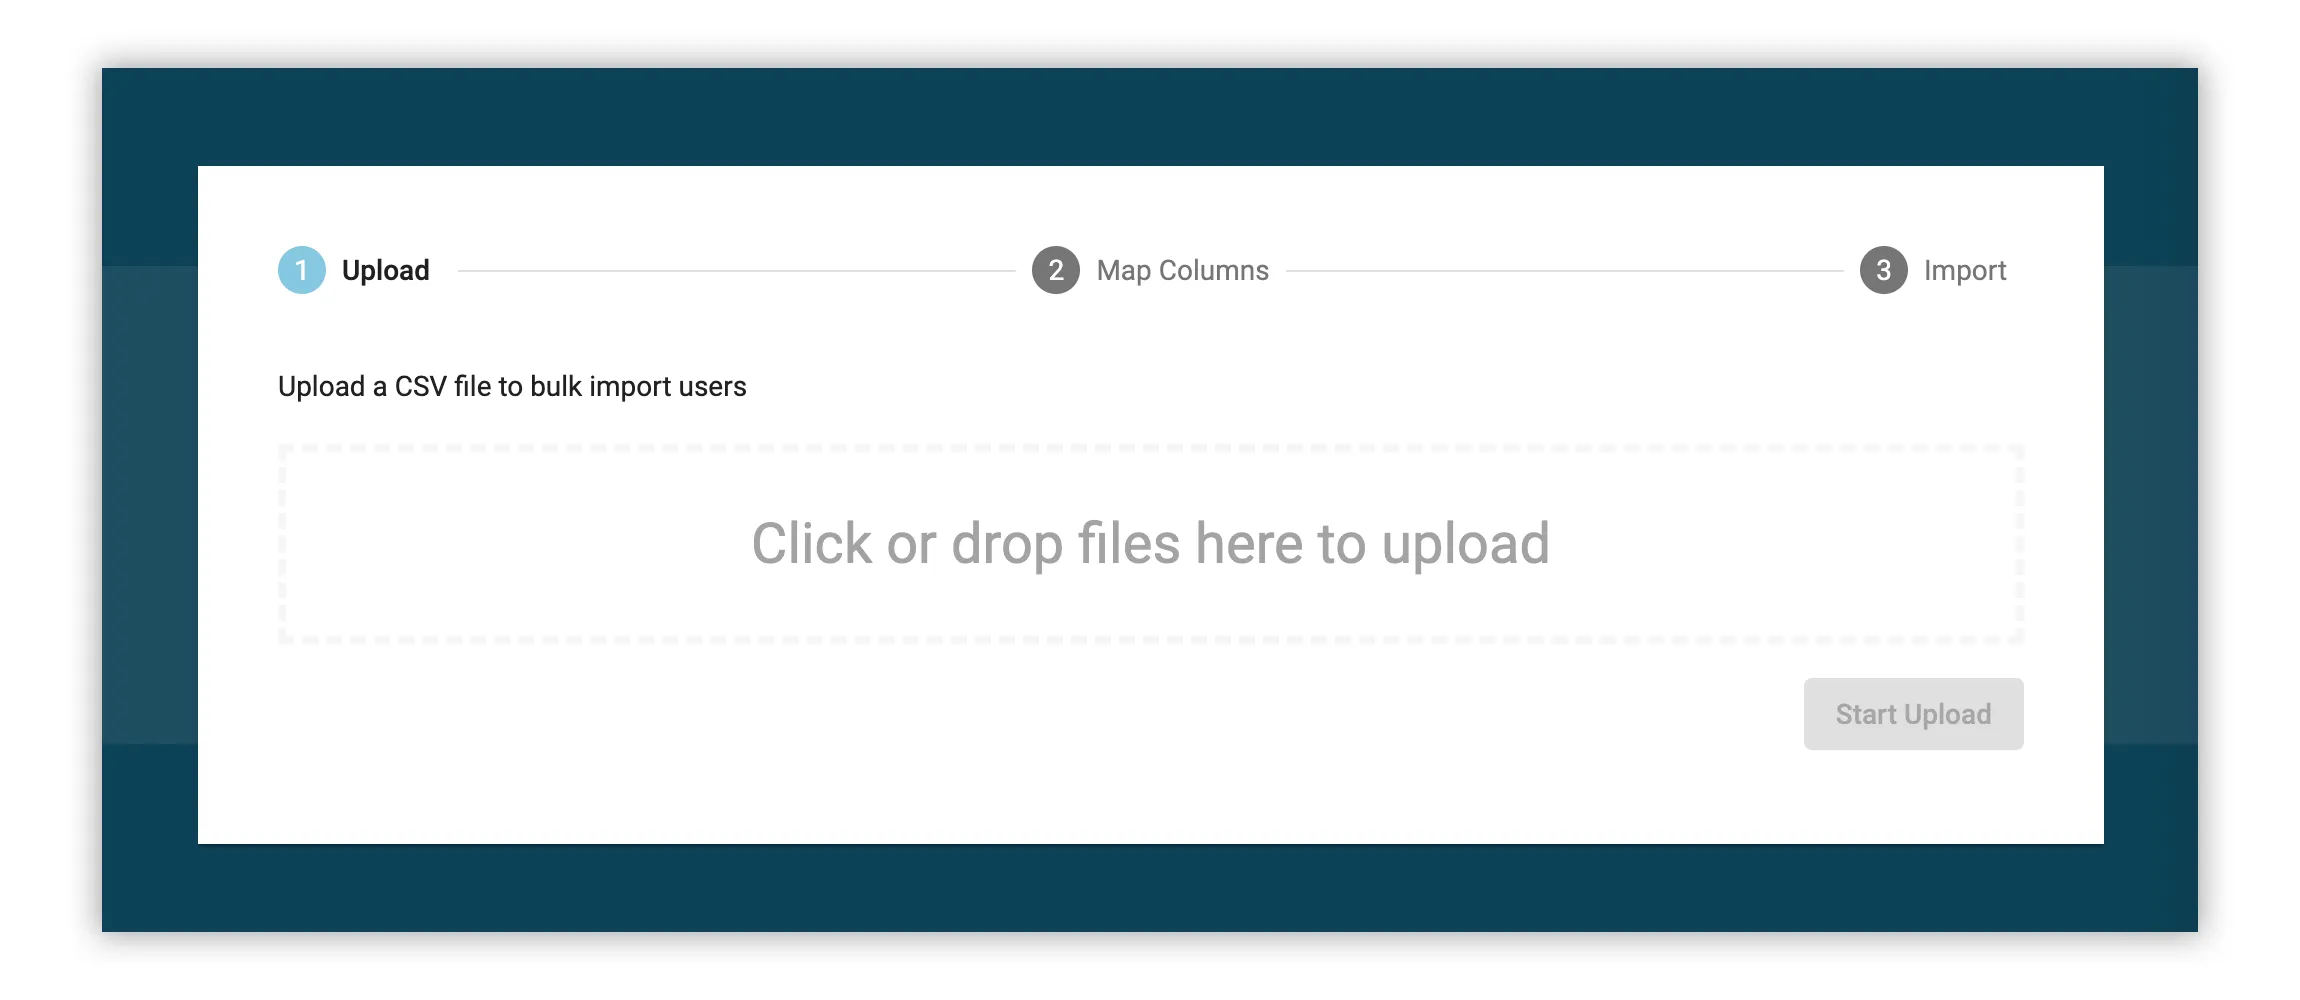
2. Drag and drop a CSV file with your users and their attributes into the designated area of the page and click Start Upload.
3. Once the upload has completed, a screen will be displayed allowing you to map each column from your CSV file to a ClearXP resource, along with a preview of the first few rows of data from your CSV file.
For each column you wish to import, click the drop down and select the resource that column should be mapped to. A summary of possible values include:
| Resource | Description |
|---|---|
| User Attributes | Any configured user attributes will be listed under this resource heading. The selected attribute will be added to the user’s profile and can be used to segment the user for user groups, enrolments and report generation. See the Importing Dates section below if your user attribute is a date for additional formatting options. |
| Add To Group | Enter the name of an existing User Group that you wish to add the user to. The group must exist in the system already or the user will not be added. |
| Add To Enrolment | Enter the name of an existing Enrolment that you wish to add the user to. The enrolment must exist in the system already or the user will not be added. |
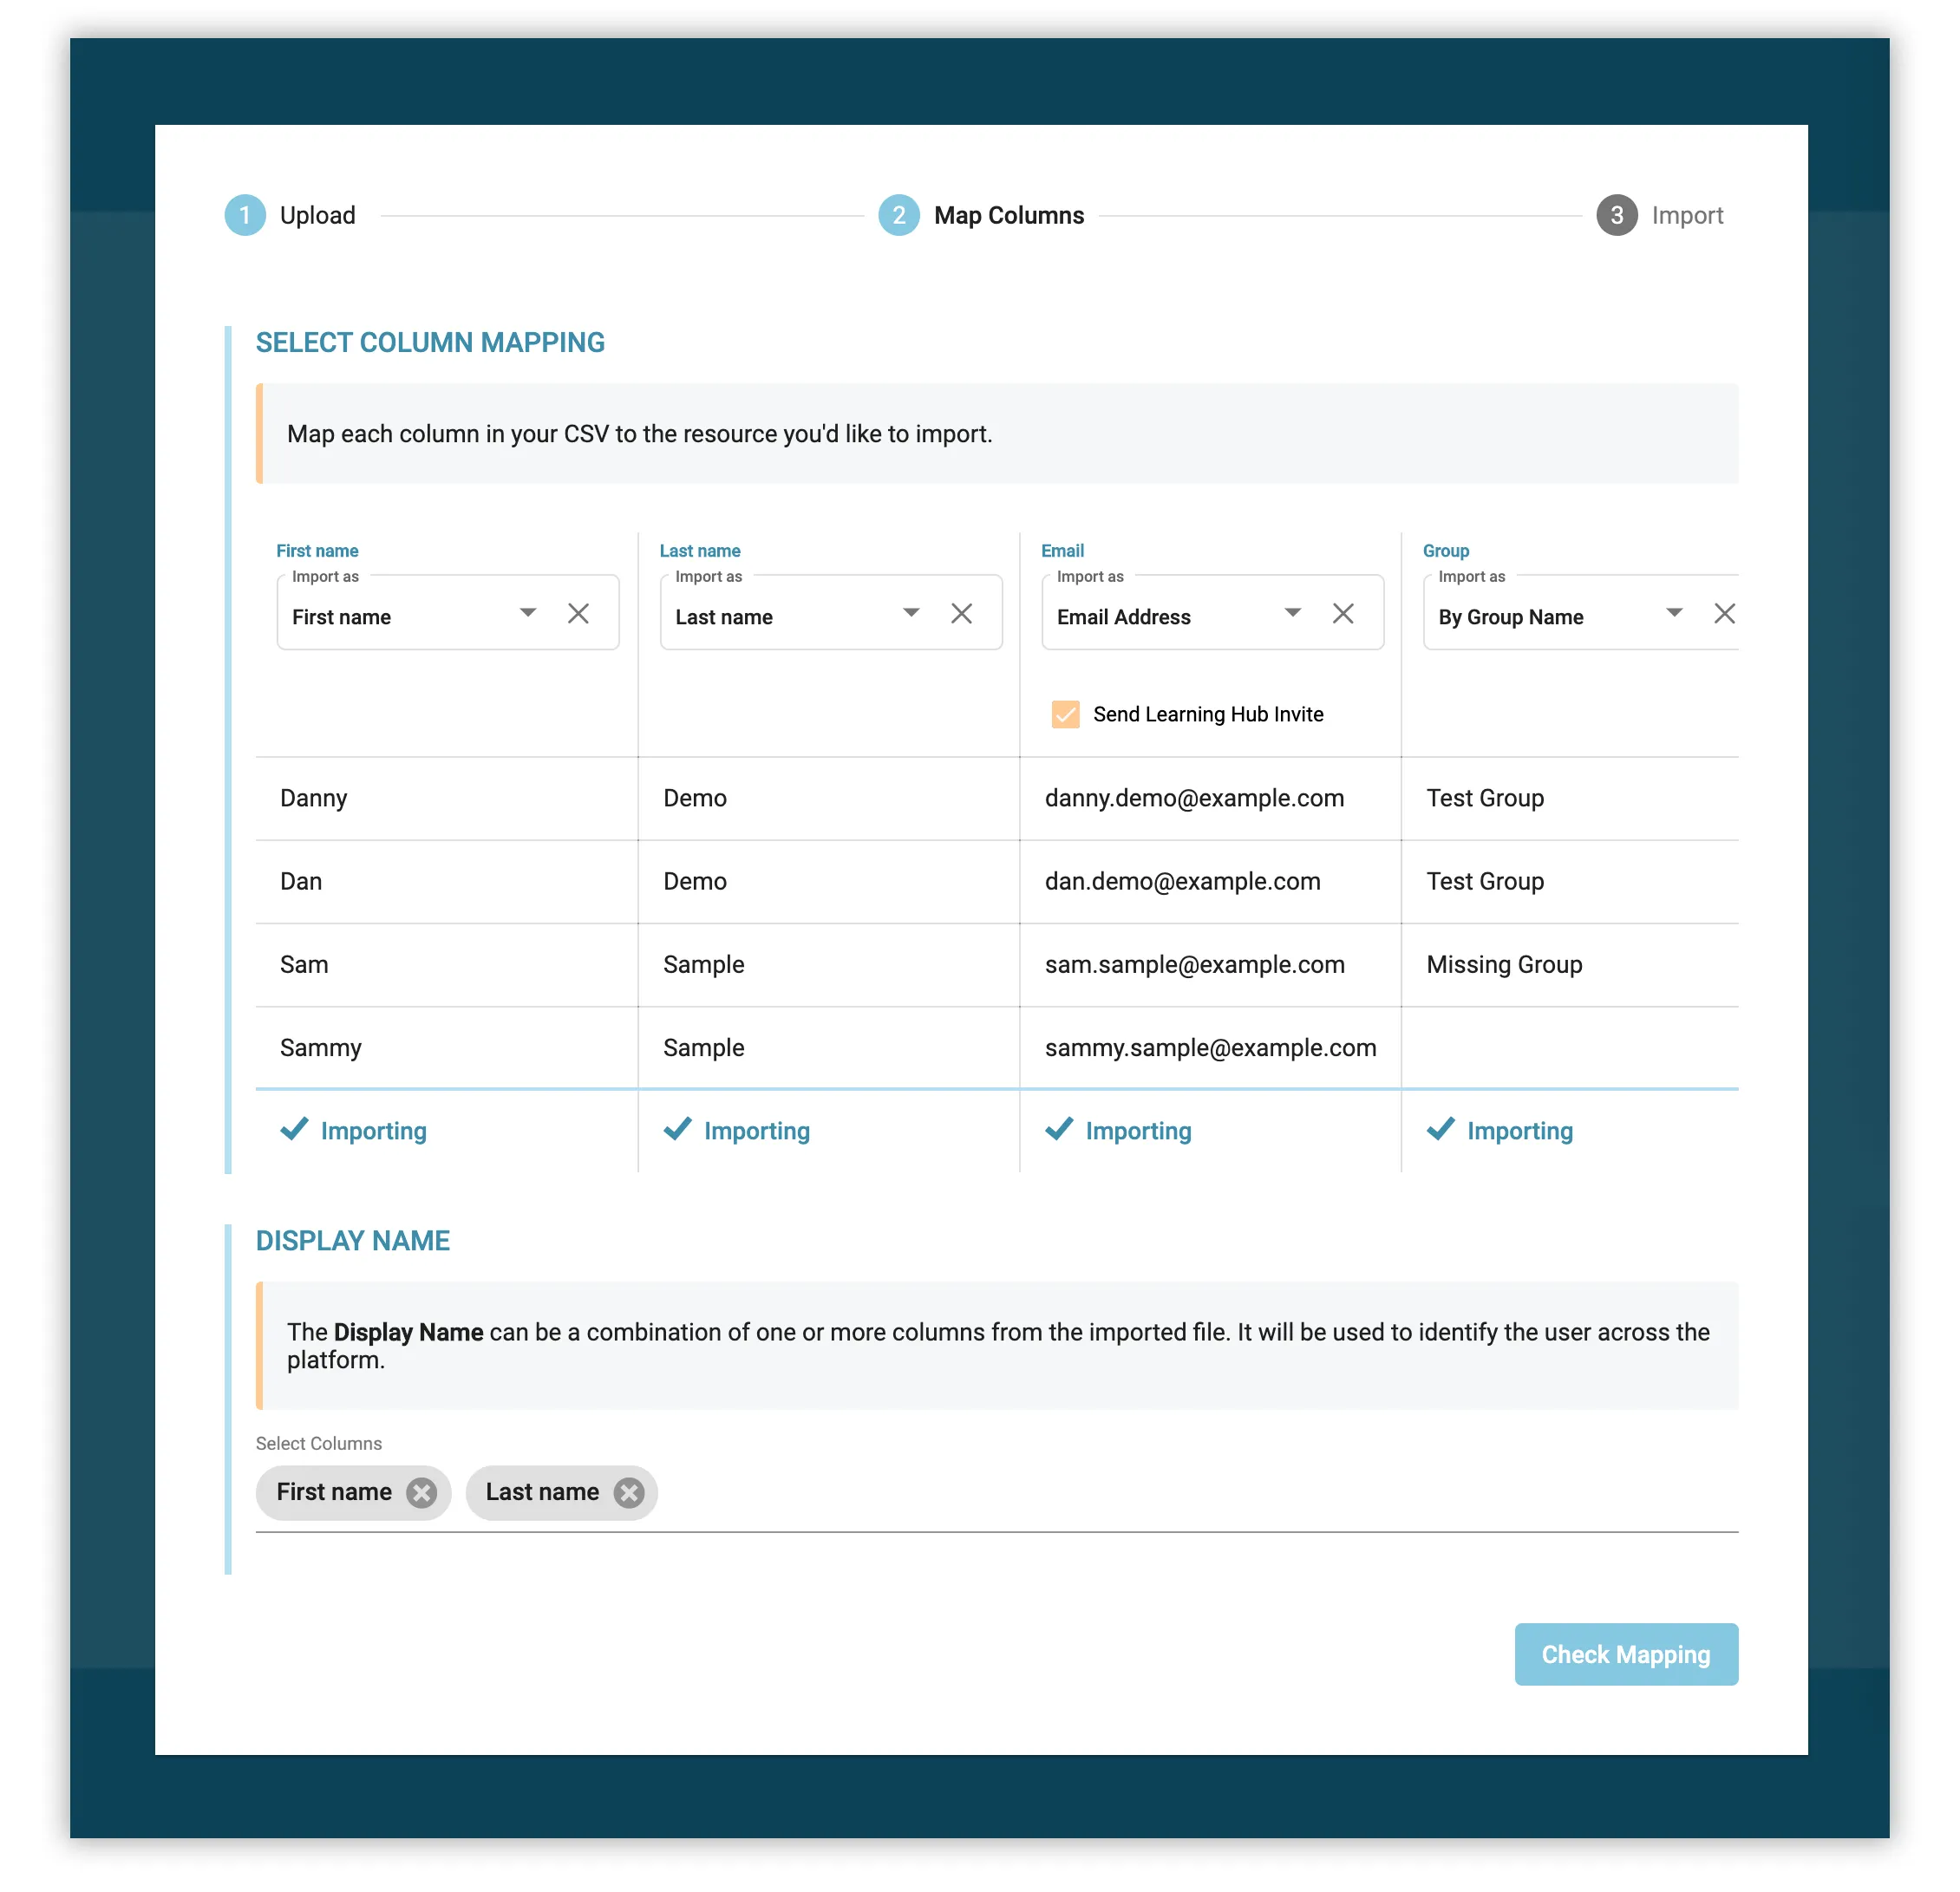
4. Ensure you select a Display Name for your users. This name may be populated by a value from a single column or composed of values from multiple columns (such as First Name and Last Name) separated by a space.
5. Click Check Mapping to validate your configuration and see a summary of actions that will be taken. The summary screen will outline how many rows contain new users or existing users, as well as any errors or warnings that may occur when importing this file.
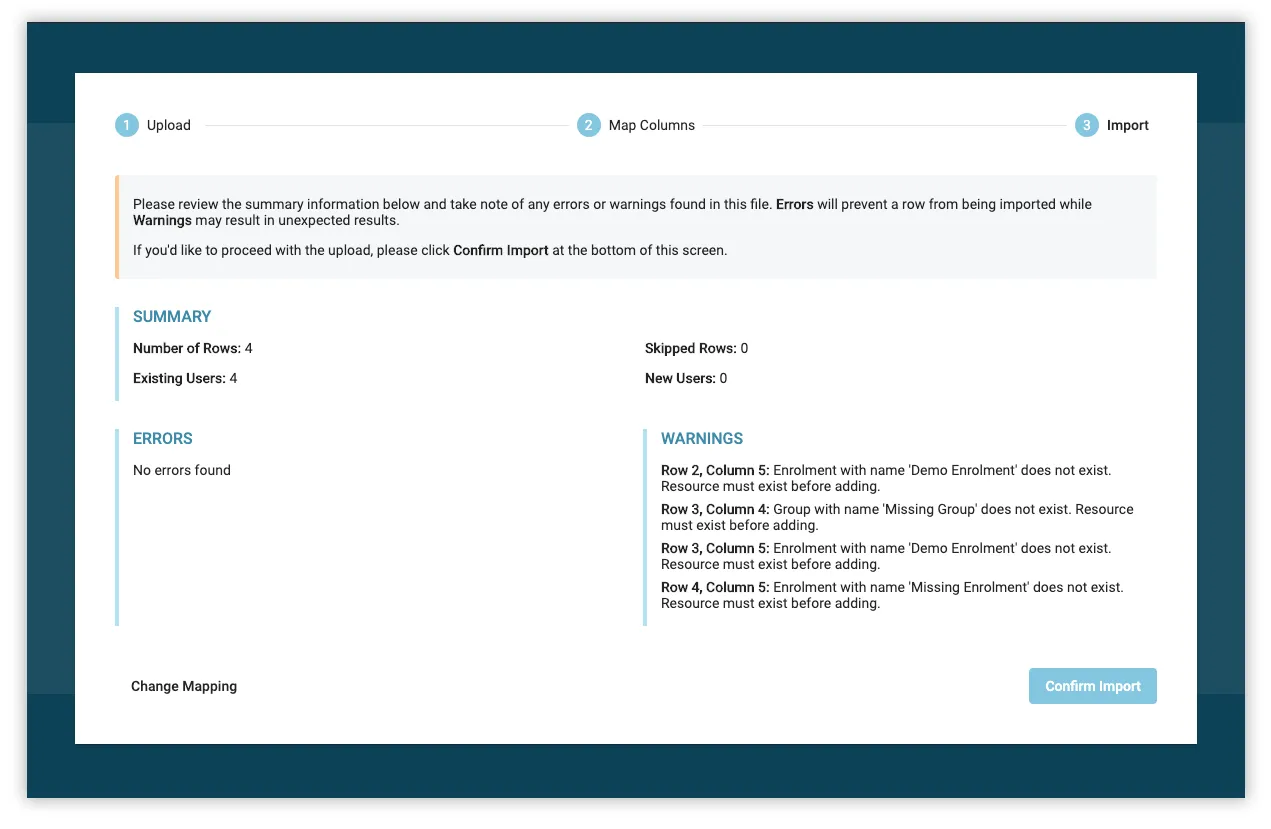
It is advised that you review this summary screen carefully. Sometimes it is safe to ignore warnings but in other cases, it may result in corrupt data so read each warning message and use your best judgement before importing. You can always return to the mapping screen and remove a column from import if you’re unsure of the consequences of importing it.
6. When you’re satisfied that the mapping is correct, click Confirm Import to queue the file for importing. After several minutes, this file will be imported and any new users will appear in the system.
Sample CSV for Users
Section titled “Sample CSV for Users”The below is an example CSV file that includes 4 users with columns for 3 different user attributes (First name, Last name, and Email) as well as a column for adding to a group (Group) and adding to an enrolment (Enrolment).
| First name | Last name | Group | Enrolment | |
|---|---|---|---|---|
| Danny | Demo | danny.demo@example.com | Test Group | |
| Dan | Demo | dan.demo@example.com | Test Group | Demo Enrolment |
| Sam | Sample | sam.sample@example.com | Missing Group | Demo Enrolment |
| Sammy | Sample | sammy.sample@example.com | Missing Enrolment |
First name,Last name,Email,Group,EnrolmentDanny,Demo,danny.demo@example.com,Test Group,Dan,Demo,dan.demo@example.com,Test Group,Demo EnrolmentSam,Sample,sam.sample@example.com,Missing Group,Demo EnrolmentSammy,Sample,sammy.sample@example.com,,Missing EnrolmentUploading Activities
Section titled “Uploading Activities”As opposed to creating multiple activities and setting values manually through the user interface, it’s possible to bulk create or update activities by importing a CSV file.
1. In the ClearXP admin interface, navigate to Activities > Events and click Bulk Upload
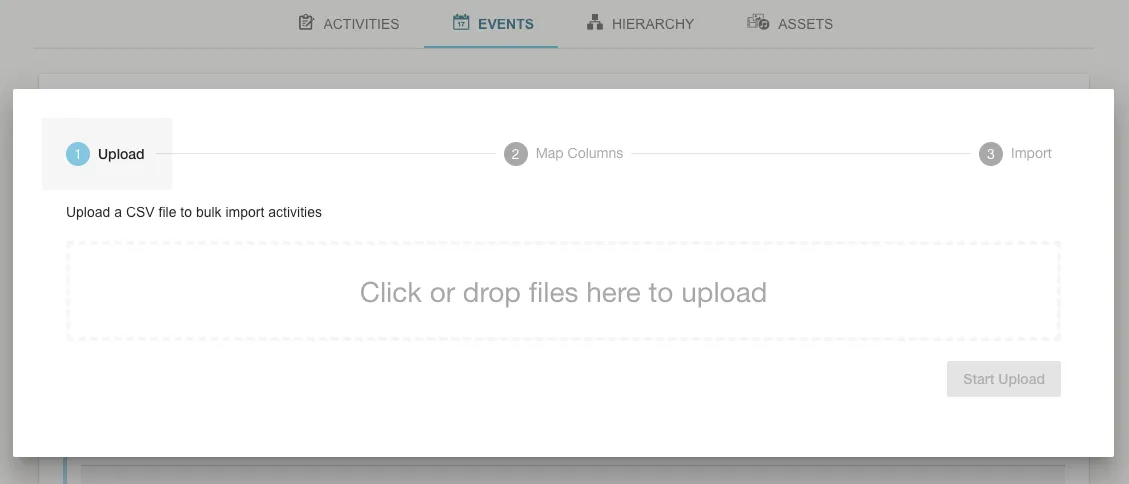
2. Drag and drop a CSV file with your users and their attributes into the designated area of the page and click Start Upload.
3. Once the upload has completed, a screen will be displayed allowing you to map each column from your CSV file to a ClearXP resource, along with a preview of the first few rows of data from your CSV file.
For each column you wish to import, click the drop down and select the resource that column should be mapped to. A summary of possible values include:
| Resource | Fields | Description |
|---|---|---|
| Activity Fields |
| Generic fields that apply to all activity types. |
| Activity Attributes | Any configured activity attributes will be listed under this resource heading. The selected attribute will be added to the activity and can be used when searching or in report generation. | |
| Event Fields |
| Event-specific fields that will be displayed when viewing the Event Screen in the Learning Hub. Enrolment Mode must be one of open, manager-approval, or closed. |
| Session Fields |
| Session-specific fields that will be displayed when viewing the session Screen in the Learning Hub. See Importing Dates for instructions on formatting the Start Date and End Date fields. The Time Zone must be specified in the Continent/City format, please see the TZ column in this List of Time Zones for all available time zone values. |
| Session Venue |
| Links the session to a facility and room venue. |
| Session Facilitator | Adds a facilitator to the session by name or unique identifier (if configured). See the Multiple Resources section for assigning multiple facilitators at once. |
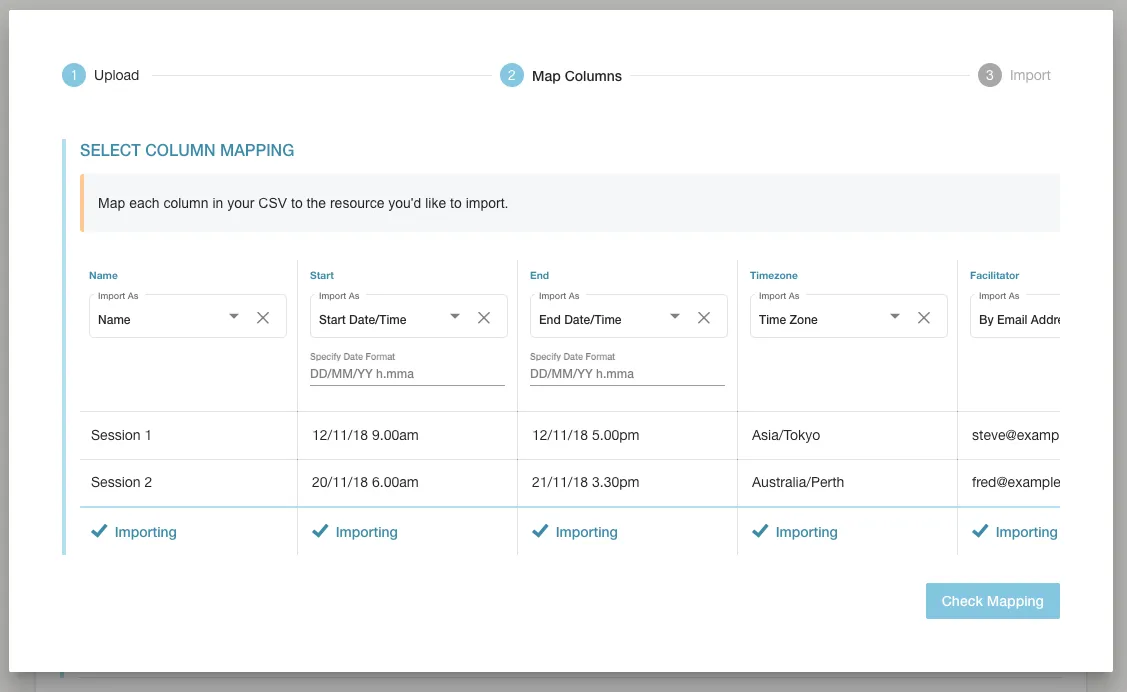
4. Click Check Mapping to validate your configuration and see a summary of actions that will be taken. The summary screen will outline how many rows contain new users or existing users, as well as any errors or warnings that may occur when importing this file.
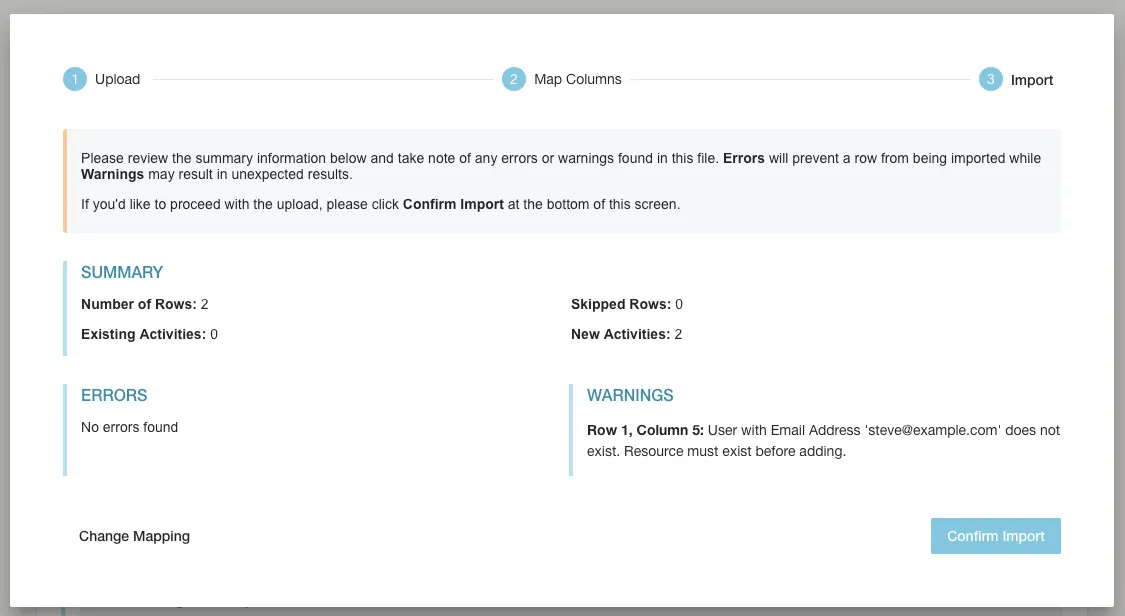
It is advised that you review this summary screen carefully. Sometimes it is safe to ignore warnings but in other cases, it may result in corrupt data so read each warning message and use your best judgement before importing. You can always return to the mapping screen and remove a column from import if you’re unsure of the consequences of importing it.
5. When you’re satisfied that the mapping is correct, click Confirm Import to queue the file for importing. After several minutes, this file will be imported and any new activities will appear in the system.
Sample CSV for Activities
Section titled “Sample CSV for Activities”The below is an example CSV file that includes 1 event and 2 sessions with columns for Name, Event Cost, Session Start Date, Session End Date and Session Time Zone.
In this example we’re importing an event and a session at once, so where a column is not applicable, the value is left blank to ensure it is skipped.
| Name | Cost | Start Date | End Date | Time Zone |
|---|---|---|---|---|
| Workshop | 20 | |||
| Session 1 | 12/11/18 9.00am | 12/11/18 5.00pm | Asia/Tokyo | |
| Session 2 | 20/11/18 6.00am | 21/11/3.30pm | Australia/Perth |
Name,Cost,Start Date,End Date,Time ZoneWorkshop,20,,,Session 1,,12/11/18 9.00am,12/11/18 5.00pm,Asia/TokyoSession 2,,20/11/18 6.00am,21/11/18 3.30pm,Australia/PerthAdvanced Usage
Section titled “Advanced Usage”Importing Dates
Section titled “Importing Dates”The bulk importer for users and activities may sometimes require you to specify the format of a date you are importing. This might happen if importing a user attribute that is of the date format, or when importing a Session activity with a start or end date.
Because the import tool does not constrain what format dates must appear as in the CSV file, it is the responsibility of the admin to specify how the date is formatted so that it can be imported correctly.
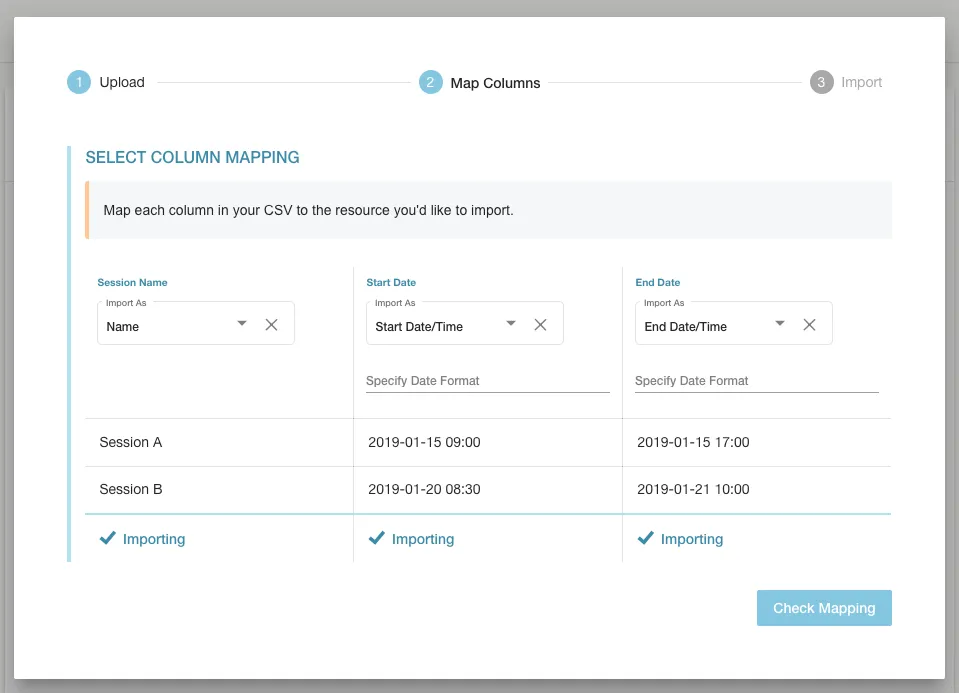
See the below example CSV file for importing two sessions.
| Session Name | Start Date | End Date |
|---|---|---|
| Session A | 2019-01-15 09:00 | 2019-01-15 17:00 |
| Session B | 2019-01-20 08:30 | 2019-01-21 10:00 |
Session Name,Start Date,End DateSession A,2019-01-15 09:00,2019-01-15 17:00Session B,2019-01-20 08:30,2019-01-21 10:00When this file is uploaded and mapped, the import tool will request a date format for both Start Date and End Date.
The Date Format field takes a series of tokens that map to the format of the date you are trying to import. The below is a reference table for all allowed tokens:
| Token | Example | Description |
|---|---|---|
YYYY | 2019 | 4 or 2 digit year |
YY | 19 | 2 digit year |
M MM |
| Month number |
D DD |
| Day of month |
H HH |
| Hours (24 time) |
h hh |
| Hours (12 hour time) (Should be used with |
a A |
| Post or ante meridiem |
m mm |
| Minutes |
s ss |
| Seconds |
Given this reference table, we can determine that our sample file should use the Date Format of yyyy-mm-dd HH:mm to correctly import each session:
| Row | Column Value | Result |
|---|---|---|
| Session A - Start Date | 2019-01-15 09:00 | Jan 15th, 2019 at 9am |
| Session A - End Date | 2019-01-15 17:00 | Jan 15th, 2019 at 5pm |
| Session B - Start Date | 2019-01-20 08:30 | Jan 20th, 2019 at 8.30am |
| Session B - End Date | 2019-01-21 10:00 | Jan 21st, 2019 at 10am |
Multiple Resources
Section titled “Multiple Resources”When bulk importing users or activities, it’s often desirable to link the imported entity to some other resource in the system. This may include assigning the imported user to a Group or Enrolment – the documentation above adequately covers how this can be done, however, it may not be clear that multiple resources can be assigned to a single user at once.
Take for instance, the following sample CSV for importing two users:
| Name | Group 1 Name | Group 2 Name |
|---|---|---|
| John Smith | Sales | |
| Kelly Warner | Marketing | Managers |
"Name","Group 1 Name","Group 2 Name""John Smith","Sales""Kelly Warner","Marketing","Managers"The first row contains the user John Smith who will be added to the group Sales, if it exists. The second row, however, contains the user Kelly Warner who will be added to both the Marketing and Managers groups.